
Along with making vanilla extract for my holiday gifting this year, I also decided to make some Soy Wax candles! They were definitely an adventure, and I would love to try again taking into account the things I learned along the way this time around.
I searched high and low for the best prices and options for buying soy wax and all the other ingredients, and ended up at Soy Scentsational's shop! This was the kit I bought to make my candles and the only other thing I had to buy to make the candles was a candy thermometer and mason jars. I already had a double boiler so I chose to use this as opposed to a candle making pitcher. I loved that my kit had customizable options for both color and scent! It was hard narrowing down my scents! I'm normally a very fruity-candle loving gal but I chose to use more seasonal options this time around.
I did a lot of research on various candle making forums, but Soy Scnetsational's kit came with directions, so I used those as my main recipe. Lots of tips and help can be found on CandleScience's website. I found this to be a great resource for someone who knew nothing.


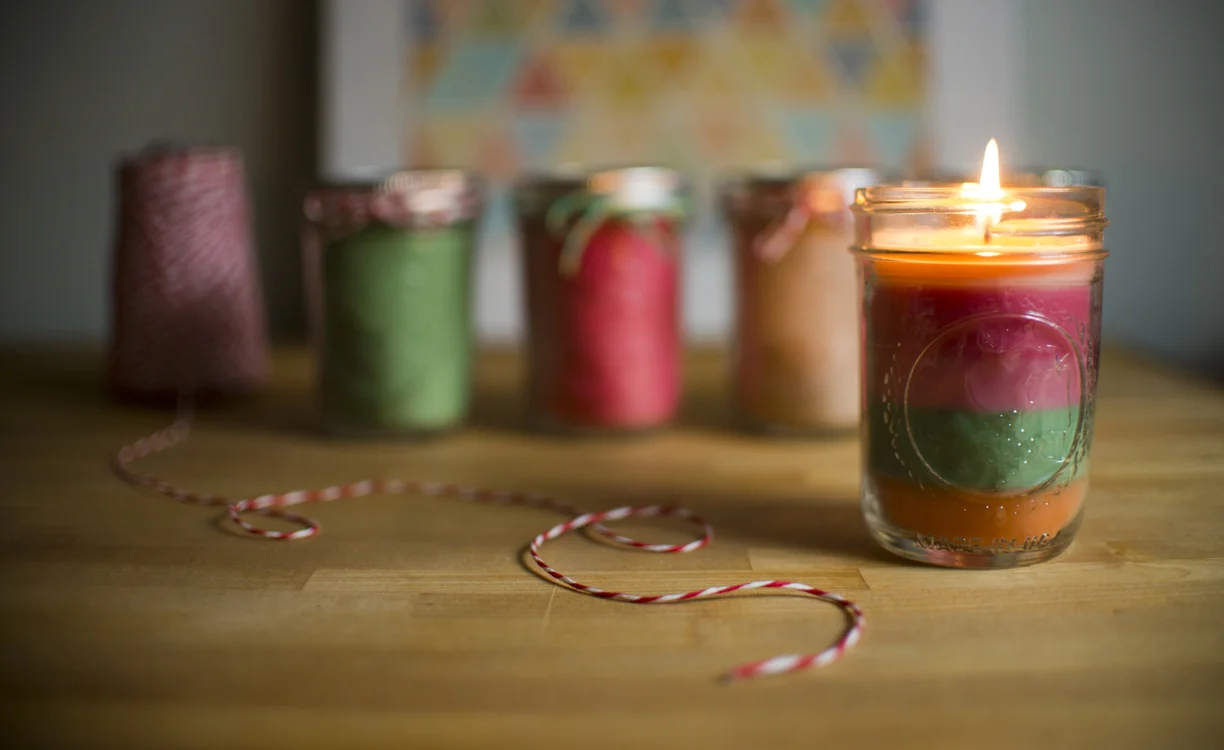
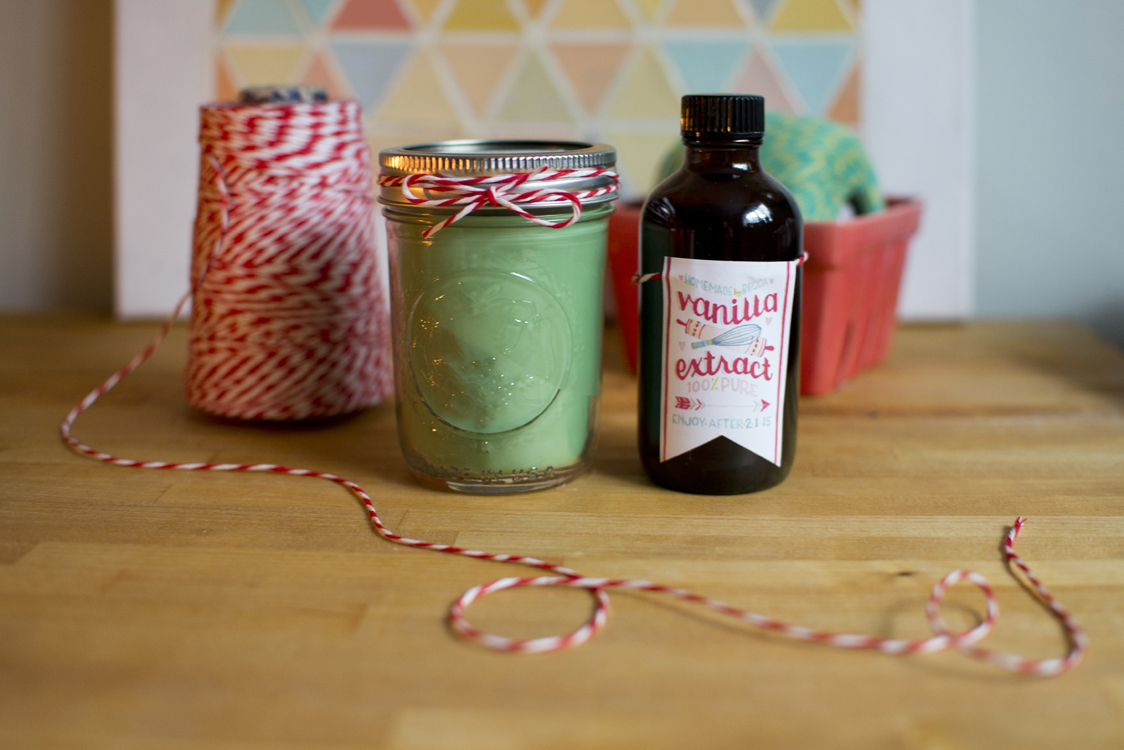
Just like with the vanilla, I loved the opportunity to package these up and make some labels for them. I used Avery Sticker paper that I printed on at home and cut to the shape I wanted to fit the lids. For the finishing touch, I used my favorite Studio Carta twine to wrap around the jar lids.

While they came out pretty delicious smelling and nice for a first try I did learn a few things along the way:
- Making candles is pretty nauseating...maybe it was just the scents I was using? But I had a pretty steady headache while I was making them. Not fun. Definitely open windows if it is a possibility (sadly, not an option in New England winter) or have a fan going. I'm thinking this would be a great summer project with windows open and fans blowing out.
- Do a couple rounds of pours if possible. I poured each candle in one go since I made a bunch of batches of scents and it seemed fine but some of them sank a bit around the wick. After some research, I found that a few pours (even just two) could have solved this problem. I made a few candles that had multiple rounds of wax pouring in different scents, and collapsing wasn't an issue with any of these.
- See that candle in the photo above? It was supposed to be orange. The pink ones? Supposed to be red...make sure not to over dilute your color chips like I did. I think if I were to make these again I would probably keep them colorless, I really actually love the look of white soy wax candles but wanted to give color a try since it came free in my kit. Some worked really well, so it was worth trying.
- I also wish I had bough smooth edge mason jars. Or at least some with one smooth side. I would have loved to have the label affix to the side of the jar as opposed to the lid, which was more limiting. It would have been nice to match the label in shape to the vanilla, or do something similar.
- You have to be INCREDIBLY patient. The initial melting goes really fast and so does the color and dye adding, but boy do they take a long time to properly cool before you can pour them. I suppose you could pour right away, but everywhere I looked, I read it was best to let them significantly cool before pouring to avoid crystalizing and maintain a smooth texture. I did find the texture perfect when I waited, so I would still recommend this.
Overall though, I loved the candle making process (other than the headache) and totally respect small batch candle makers. I would love to sell small batch products in the future in an online shop-things including candles and my wood burned spoons or other wood burned things (pssst I have some wood burned goodies I made during snow days-check back soon for photos!). What do you think?
Let me know if you've given candle making a try and if you have any resources you love and go back to! -b